Sometimes homemade is great. Sometimes it’s not. In the case of my pull-up bar…it is ridiculous. As in ridiculously awesome. If you you want to build a DIY pull up bar you are in the right place. Below is what I built in my back yard over the past couple weekends. First, load up the family for a trip to your local Lowes or Home Depot store.
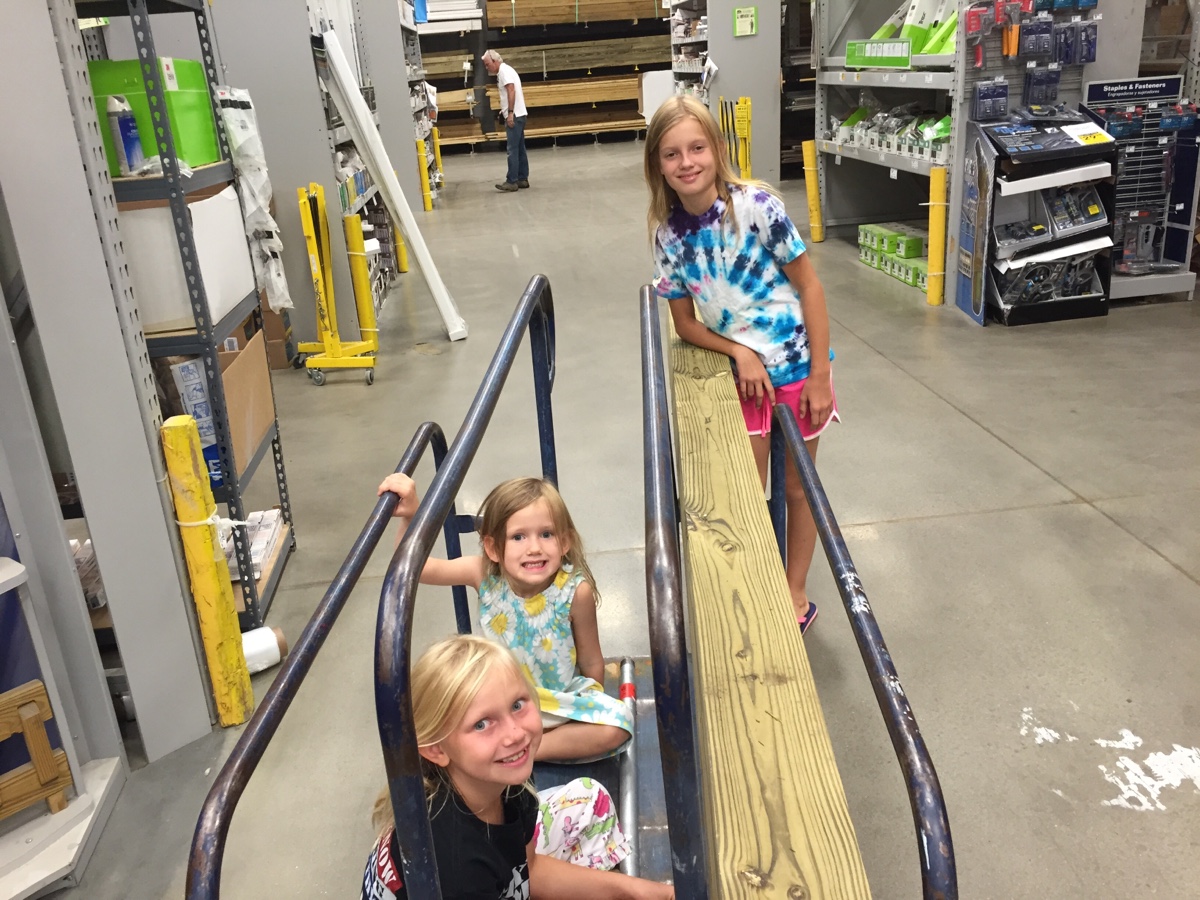
If you have kids, get them involved. The more your kids put down their iPods and get involved with a real project the better. Here are my three older girls with me at Lowes.
I had to ask several Lowes employees before I found someone that had a clue. Reading this post will help you know what to ask for.
Materials to Build a DIY Pull Up Bar
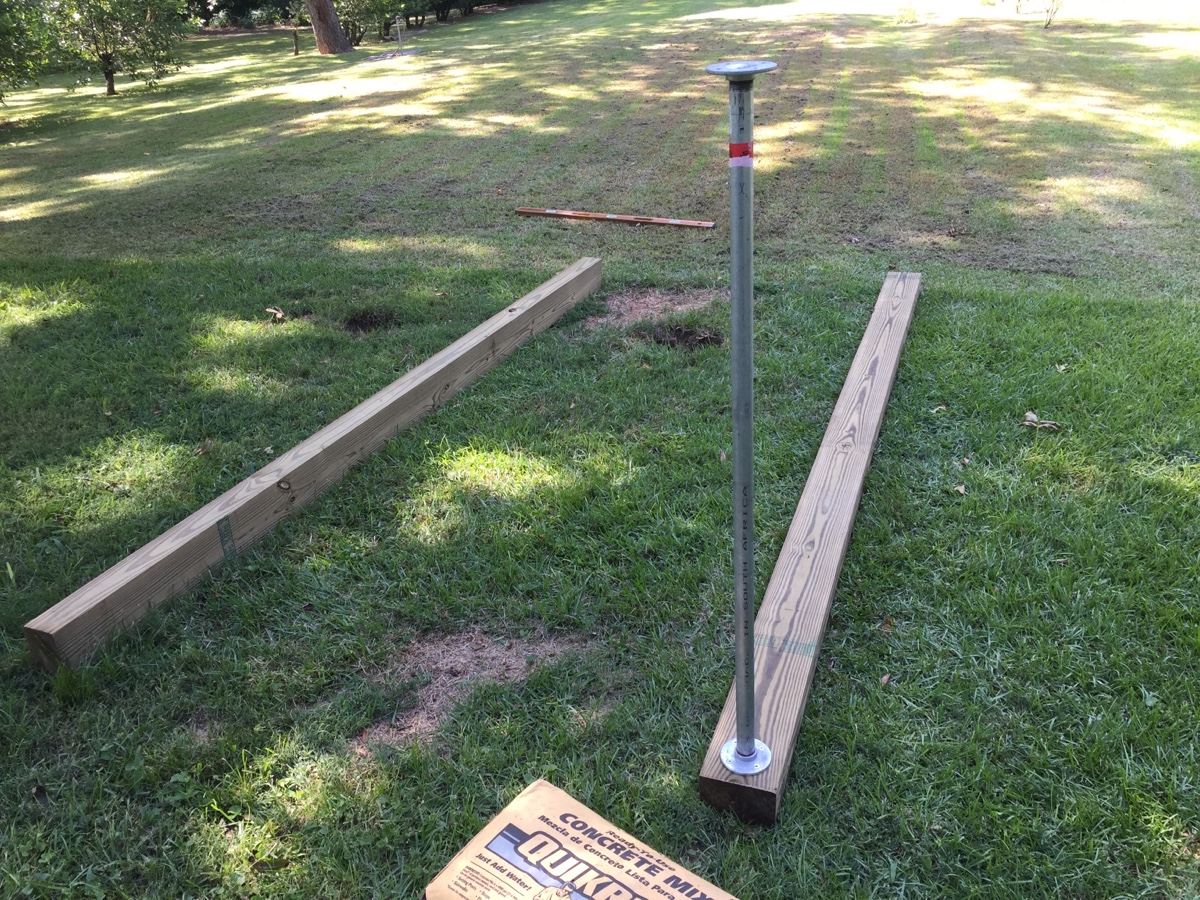
2 4×6, 12-foot posts (use treated lumber)
1 4 foot, 1-inch threaded pipe
2 1-inch floor flanges
1 tube of Loctite Threadlocker
8 wood screws (I got one pack of #14 screws and two packs of #12 screws… nine total)
1 tube of thread glue/sealant (this is to keep the threaded pull up bar from unscrewing when you crank on it)
4 80-pound bags of Quikcrete
All this cost me almost exactly $125, which I consider to be a very reasonable investment in my own and my family’s fitness.
Tools
You will need a few tools to make this happen. Work smarter, not harder right?
1 PhD (as in Post Hole Digger…I borrowed the joke and the tool from my neighbor Bud — saved me $35…thanks Bud!
1 skill saw — My father-in-law bought me one of these a couple months ago. Thanks Mr. Baswell! If you don’t have one, they’re approximately $40 at Lowes. You will only need this if your posts are too long.
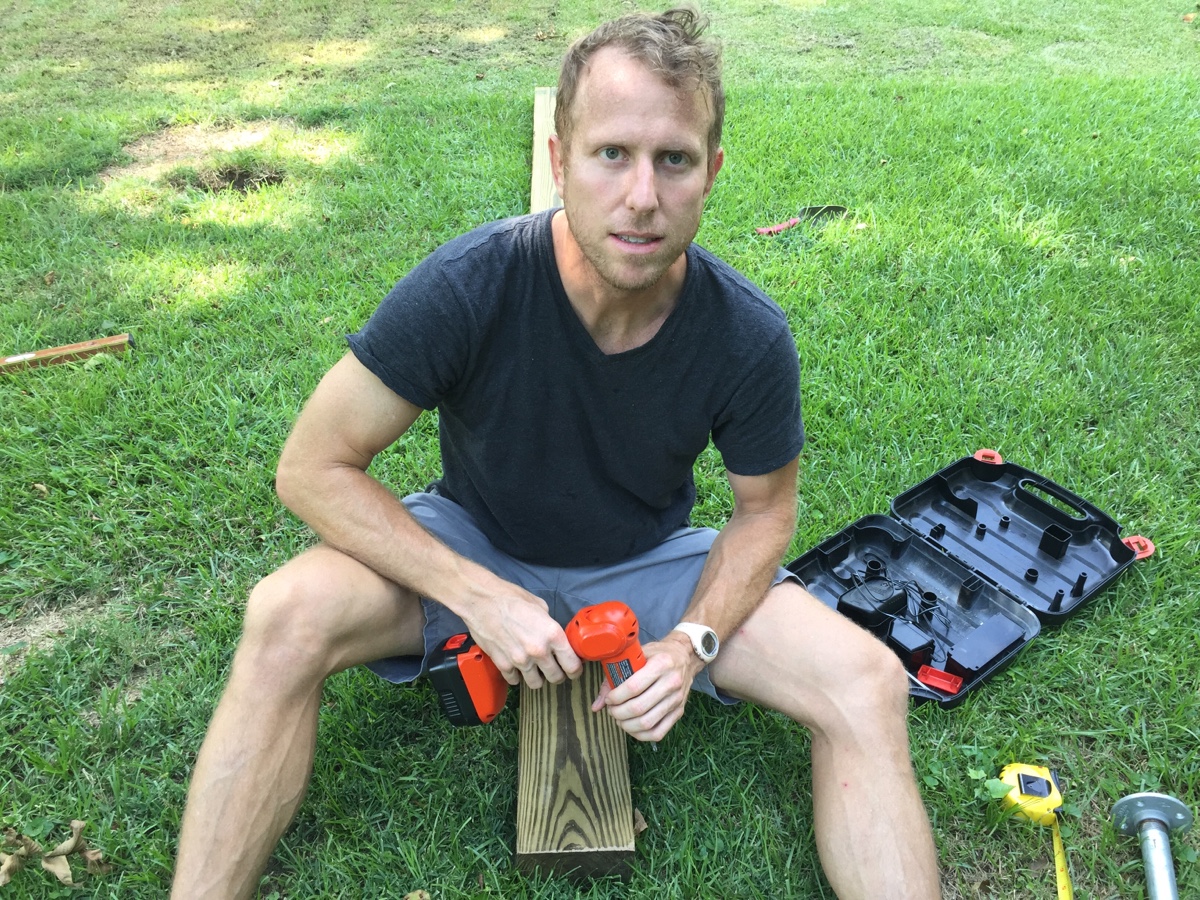
1 cordless drill
1 4-foot level
1 person willing to work — that is me in this case!
The skill saw is only required if your posts are too long. Lowes had 8-foot posts and 12-foot posts. I went with the 12-footers and needed to make a cut. There was a six inch difference in the depth of my holes and a two inch decline between my holes, so there was a four inch (6 – 2) difference in the post length after my cuts.
Keep this in mind…you want to have a level bar when doing this. You need to keep in mind any variables when doing this project such as the length of holes, the length of posts, the incline between posts, etc.
Making a DIY Pull Up Bar in 5 Simple Steps
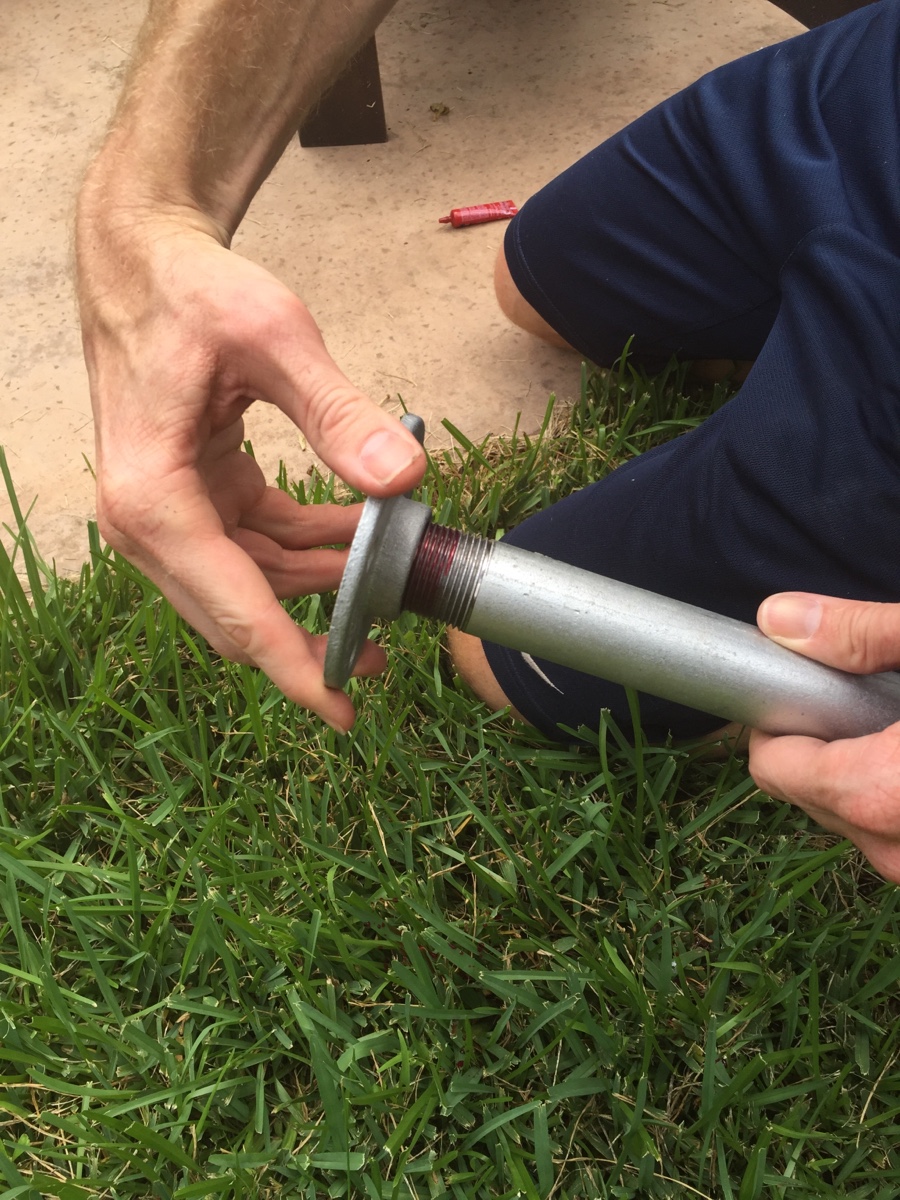
Step 1: Glue and Screw Flanges to Pipe
One of the harder parts of this project is figuring out how to easily connect the bar to the posts. Well, with a tip from my twin brother, Todd, I used some floor flanges with female threads and a one-inch pipe with male threads. He also suggested that I get some kind of glue to help seal the connection between the bar and the flanges.
After putting the Threadlocker sealant on the pipe threads, screw the floor flange on. Do this on both sides.
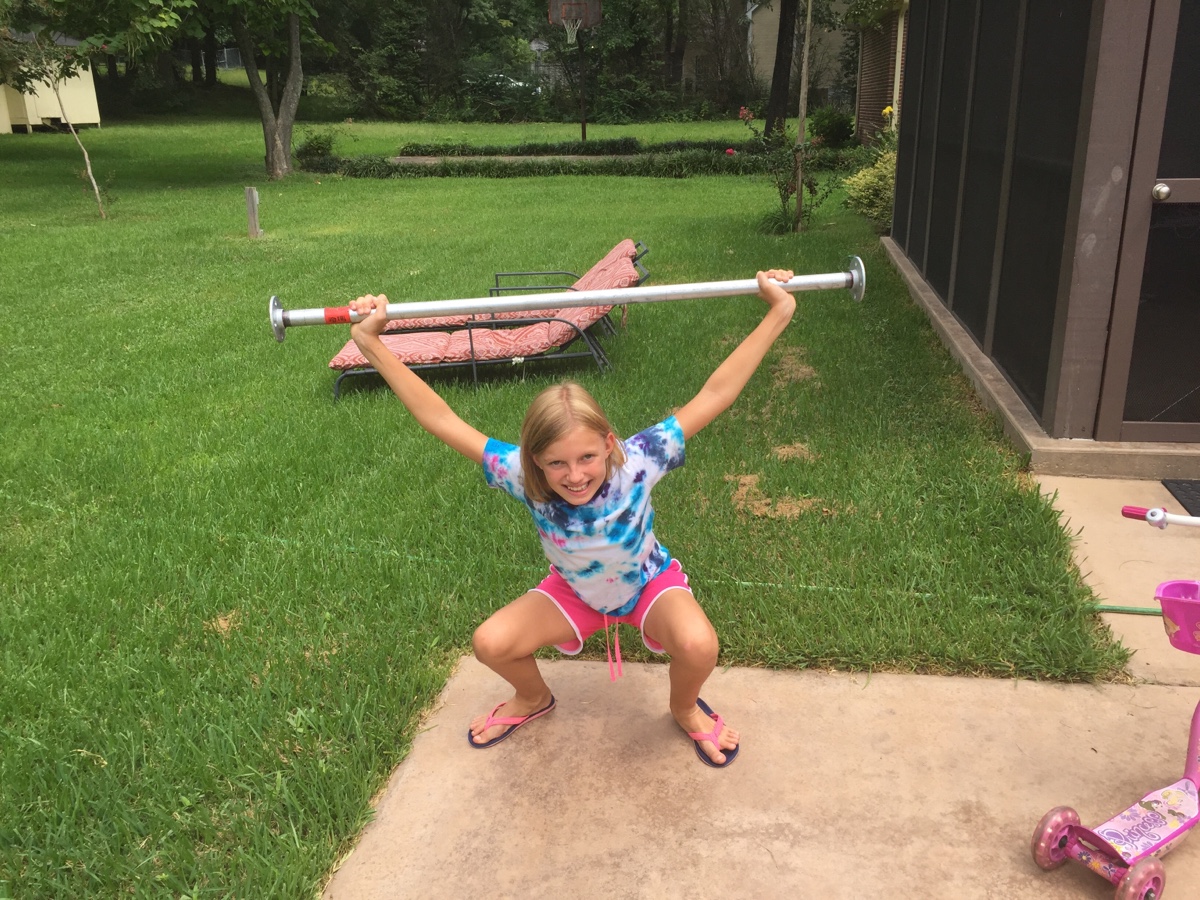
Optional step – Have any helpers practice some overhead squats with the pipe. Here is my oldest daughter. I should have her watch my Overhead Squat Video to work on her form a bit. But she looks good for a ten year old!
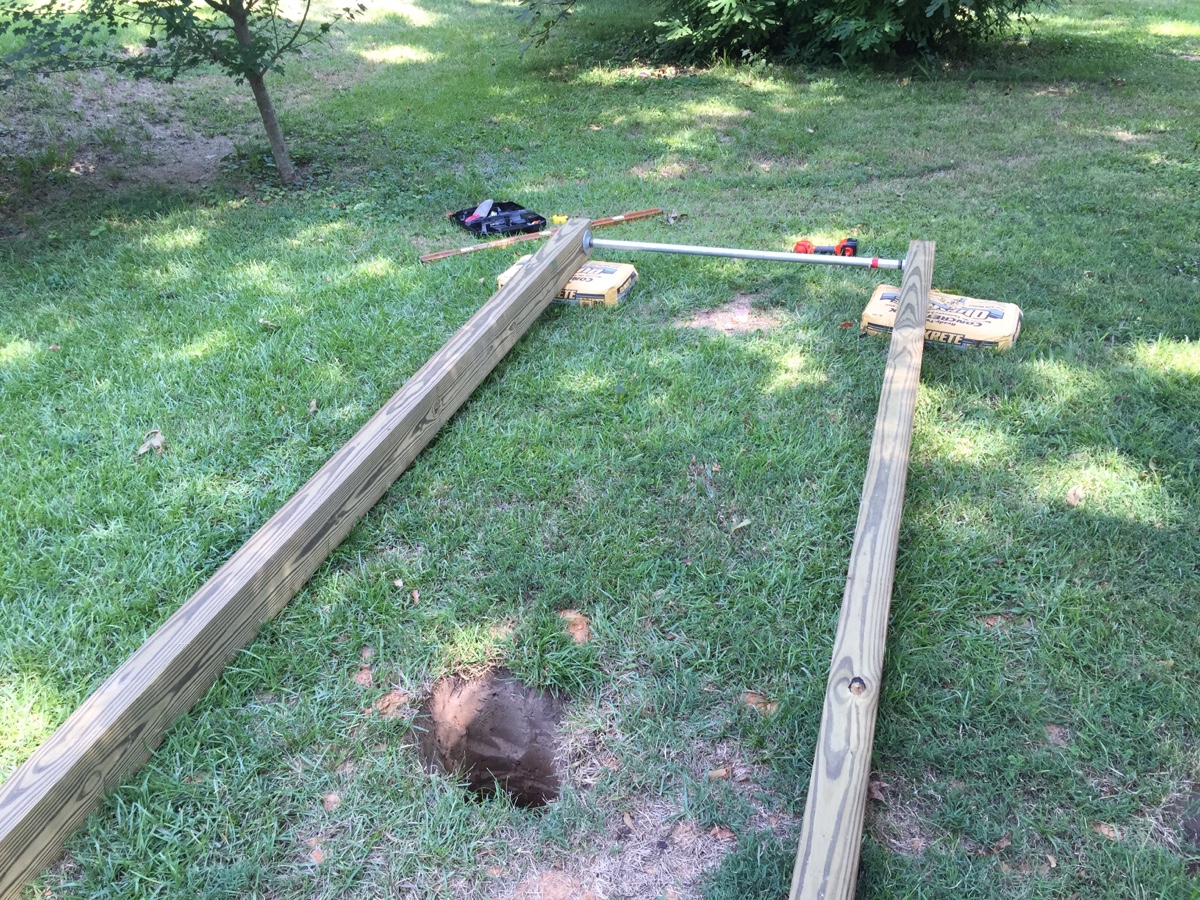
Step 2: Dig the Holes
The only labor-intensive part of this project is digging the holes. In general, I recommend digging them both two feet deep. I actually dug one 30 inches and one 24 inches, but that makes the calculations more complex. To keep it simple, you can keep things as uniform as possible.
Step 3: Cut the Posts
As I mentioned, this is only necessary if you have posts that are too long. With my 12-foot posts I needed to cut them in order to keep the bar from being the height of a basketball goal. You want to have a small jump to reach the bar, but not an all out leap.
If you have 12 -foot posts and two foot holes, and your ground is level, then you need to cut off about 18 inches to have your bar at 8 feet. Remember, with the flanges screwed into the posts, your bar will be a few inches below the top of the posts.
Step 4: Connect the Bar to the Posts
It may be debatable whether step 4 or 5 should go first. I chose to connect the bar to the posts first. The idea here is that if the bar is connected evenly to the posts from the top of the bar, you can then adjust the final level of the pull up bar by digging the hole deeper or adding dirt back to your holes.
This is the step where the cordless drill comes in handy. I used a pencil to mark the holes, then drilled some holes with a bit before screwing them in. I may not be the sharpest tool in the shed, but I am not the dullest either!
Screw the flange into the first post…
… then into the second post, making sure each side is symmetrically positioned from the top. Connecting the first post is easy. Notice below how I elevated each post on a bag of Quikcrete to make it easier to screw the second flange into the other post.
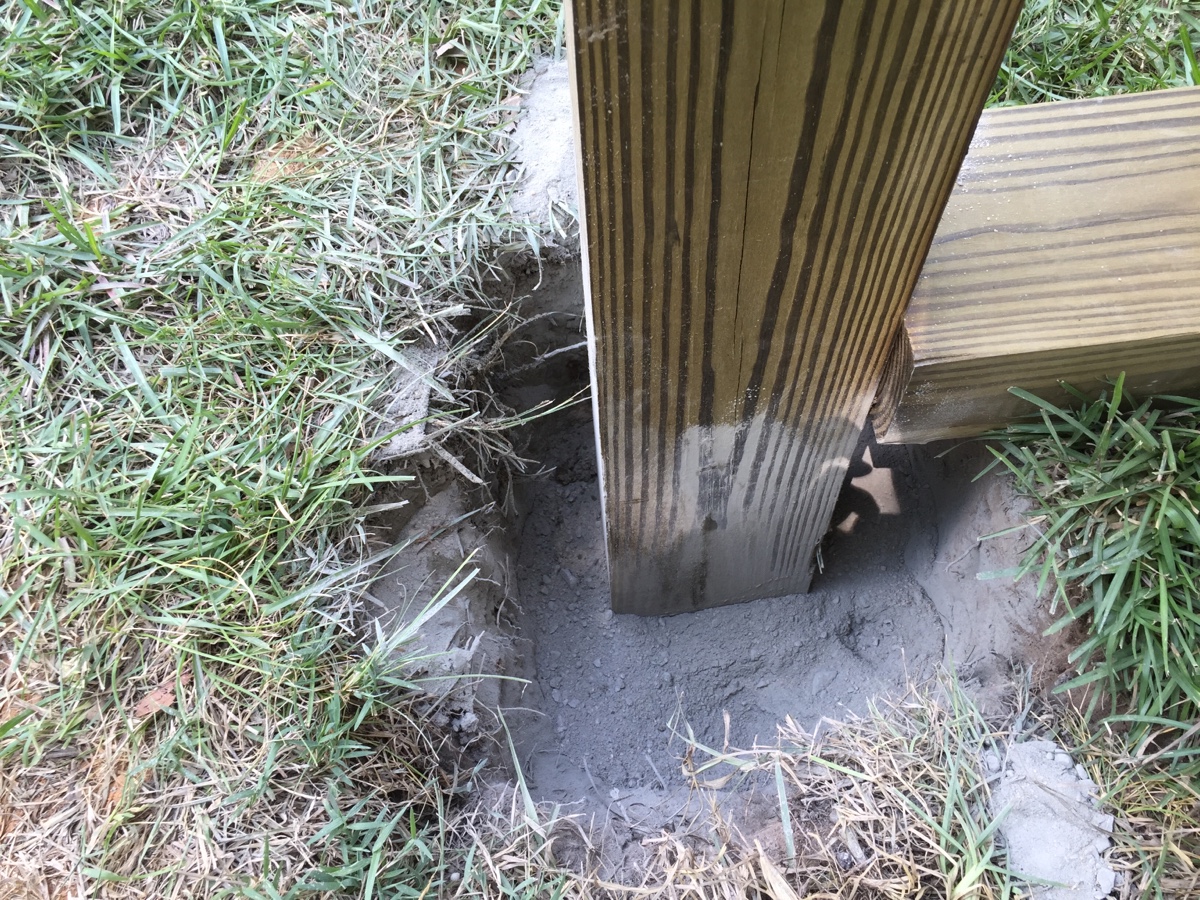
Step 5: Set the Posts
After the bar is connected to the posts, the last step is setting the posts. This is the most difficult part. Why? Because it is critical to ensure that the bar is level on the top and that each of the posts are straight up.
Ideally, you’ll have some help making sure that the post is in the right position while you dump Quikcrete into the hole. I had some help from my oldest daughter.
After ensuring your posts are straight and level, dump in the Quikcrete bit by bit and add some water all along the way. I used a long crowbar to mix the Quikcrete and water in the hole.
Take your time setting the posts. Again, you want it level and straight. Better to take your time getting it right than to rush the project and have a crooked, slanting pull up bar in your backyard. That is no good.
Step 6: Enjoy
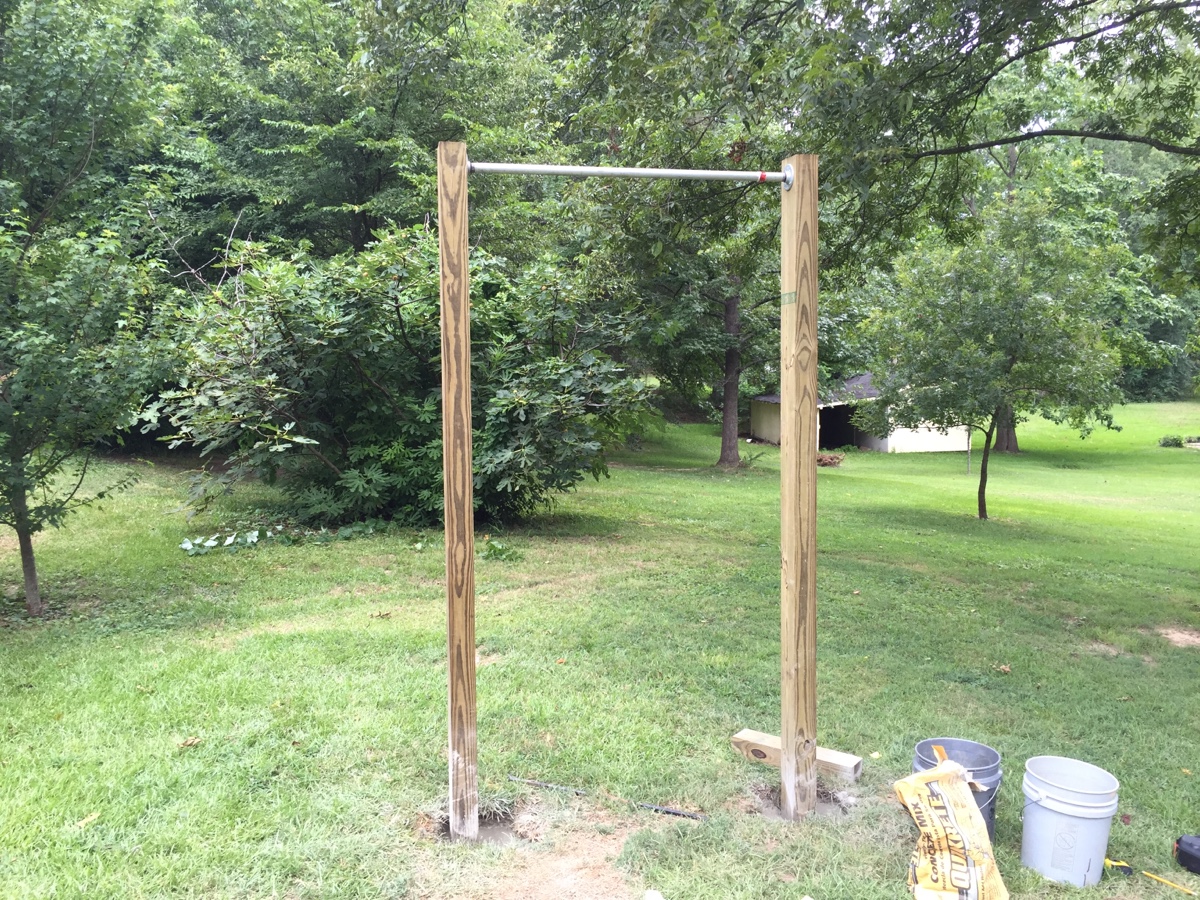
Here is the finished product. I am very happy with how it turned out. The bar is almost exactly 8 feet high and after I added 3 and 1/2 bags of Quikcrete this thing, it is rock solid! It takes 24 hours for the concrete and the posts to fully set up, so wait a day before cranking on the pull up bar. Don’t worry… there will be plenty of time, God willing, to rip some muscle ups on this thing. And don’t forget the toes to bar!
Step 7: Optionally, Add 2×4’s as Ladder for Kids
I haven’t done it yet, but I am going to screw four two-foot 2×4’s into the outer edge of one of the posts so that my younger kids can climb up and get on the bar.
Use common sense on which kids you allow to play on this. This is a real rig that would make our friends at Rogue Fitness proud. Treat it with respect. I can’t wait to rip on this thing!
If you have any questions shoot me a message and I’ll be glad to help. This is a very important piece of equipment for any home gym. Don’t be afraid of building a DIY-pull up bar! If I can do it you can do it and doing it yourself makes you appreciate it more.